Master The Art: How To Put Ribbon On A Christmas Tree Like A Pro
Table of Contents
- Why Ribbon is Your Christmas Tree's Best Friend
- The Essential Tools & Mindset for Ribbon Success
- Choosing the Perfect Ribbon for Your Tree
- Prepping Your Tree: Real vs. Artificial
- Unveiling Popular Ribbon Techniques: How to Put Ribbon on a Christmas Tree
- Achieving a Cohesive Look: Tips from the Experts
- Troubleshooting Common Ribbon Challenges
- Elevate Your Holiday Decor with Ribbon
Why Ribbon is Your Christmas Tree's Best Friend
Decorating your Christmas tree is undoubtedly one of the best parts of the holiday season, and incorporating ribbon is a truly fantastic way to make your tree stand out. Ribbon adds a touch of elegance, whether you’re aiming for a classic look, a modern vibe, or something totally unique. It’s an incredibly versatile element that can tie together your entire decorating scheme. Beyond its aesthetic appeal, ribbon serves several practical purposes. It can help fill in gaps within the tree's branches, creating a fuller, more luxurious appearance. It’s also a beautiful way to add different colors or coordinate existing ornaments into a cohesive color scheme, ensuring your tree looks thoughtfully designed. Imagine a vibrant red ribbon weaving through a tree adorned with gold and green ornaments – the ribbon acts as a visual thread, pulling all the elements together into a harmonious display. By strategically placing ribbon, you can guide the eye through the tree, highlighting certain sections or creating a sense of movement and flow. It's a simple addition that yields significant visual impact, transforming a good tree into a truly spectacular one.The Essential Tools & Mindset for Ribbon Success
The good news is, you don’t need many materials to successfully put ribbon on a Christmas tree. What you will need in abundance, however, is patience. The more time you spend on measuring, cutting, and hanging your ribbon, the better the result will be. Rushing through the process often leads to a less polished look, so embrace the journey and enjoy the creative process. Here are the basic materials you will need to put ribbon on your Christmas tree: * **The Ribbon of Your Choice:** This is, of course, the star of the show. We’ll delve into specific types in the next section, but generally, you'll want a good quantity. * **Sharp Scissors:** For clean cuts that prevent fraying. * **Floral Wire or Pipe Cleaners (Optional but Recommended):** These can be incredibly helpful for securing ribbon ends or creating dramatic loops, especially if you're working with a more elaborate design. * **A Step Stool or Ladder:** Essential for safely reaching the top and middle sections of your tree. When it comes to ribbon, a crucial tip from experienced decorators is to select one or more ribbons, with a strong preference for **wired ribbon** to help maintain shape. It’s simple to adjust wired ribbon for the right look, and it’ll stay precisely in the shape you want. It’s also significantly easier to create bold loops and billows with wired ribbon, giving your tree that professional, high-end finish. Unwired ribbon tends to droop and lose its form, making it much harder to achieve a dynamic and elegant appearance. So, while you might be tempted by a beautiful unwired option, remember that wired ribbon is your best ally in this decorating endeavor.Choosing the Perfect Ribbon for Your Tree
The type of ribbon you choose can dramatically alter the overall aesthetic of your Christmas tree. As mentioned, **wired ribbon is easier to manipulate on a Christmas tree** and is highly recommended for its versatility and ability to hold its shape. This is especially important when you’re aiming for specific drapes, loops, or cascades. You can use a variety of textures successfully, from shiny satin to classic plaid tartan or rustic burlap. Each texture brings a different feel: * **Shiny Satin:** Adds a touch of glamour and reflects light beautifully, perfect for a luxurious or traditional look. * **Plaid Tartan:** Evokes a cozy, traditional, or rustic farmhouse feel, especially in classic red and green combinations. * **Burlap:** Offers a natural, earthy, and charmingly rustic vibe, ideal for a more understated or country-themed tree. * **Velvet:** Provides a rich, opulent texture, adding depth and warmth. * **Glitter or Metallic Ribbons:** Perfect for adding sparkle and festive cheer. When selecting your ribbons, consider using ribbons in complementary colors for added depth and texture. For instance, a wide solid ribbon paired with a narrower patterned ribbon can create a sophisticated layered effect. Think about your existing ornament collection and the overall color scheme you envision for your tree. Ribbon is a beautiful way to add different colors or coordinate ornaments into a color scheme, pulling together various elements into a harmonious display. Another question I am asked frequently is, "Where do you buy your Christmas tree ribbon?" I know, the struggle is real! Finding Christmas tree ribbon can be so challenging at times, especially when you're looking for specific colors, widths, or textures. While I always update my Christmas sources page with my favorite ribbons (if this were a real blog, I'd link it here!), my general advice is to try a variety of places. Look in craft stores, home decor shops, online retailers, and even fabric stores. Sometimes, unexpected places like discount stores or seasonal pop-up shops can yield hidden gems. Don't limit yourself to "Christmas" sections; explore the general ribbon aisles for unique finds that can be adapted for holiday use. Patience in searching for the perfect ribbon will pay off in the final look of your tree.Prepping Your Tree: Real vs. Artificial
The holiday season is here, and the tradition of putting up a Christmas tree comes with it. A common question that arises is, "Can you put ribbon on a real Christmas tree?" The answer is a resounding yes! Whether you prefer the fresh, invigorating smell of a real tree or the convenience and reusability of an artificial one, ribbon can be beautifully incorporated into both. When working with a real tree, be mindful of its natural shape and the flexibility of its branches. Real tree branches can be a bit stiffer or more delicate, so gentle handling is key. The natural gaps and variations in a real tree can actually enhance the organic flow of ribbon, making it look incredibly natural and integrated. Artificial trees, on the other hand, often have more uniform branches that can be easily manipulated and fluffed, making it straightforward to tuck and secure ribbon exactly where you want it. The consistent density of artificial trees can also make it easier to achieve a symmetrical or highly structured ribbon design. Regardless of whether your tree is real or artificial, there's a crucial piece of advice from professional designers: **When using ribbon in a Christmas tree design, the designer says it’s always the first element that goes on the tree.** This might seem counterintuitive if you're used to lights first, then ornaments. However, as the expert explains, “the placement of the ribbon begins to create the movement of the overall design and allows the remaining decor to fall into place within the open spaces of the branches.” By starting with your ribbon, you establish the foundational flow and visual pathways of your tree. This early placement ensures that your ribbon isn't an afterthought, but rather an integral part of the tree's overall structure and aesthetic, making it easier to position lights and ornaments around its elegant lines.Unveiling Popular Ribbon Techniques: How to Put Ribbon on a Christmas Tree
When I was getting ready for this tutorial, I watched a bunch of other videos and blog posts, and I noticed that people often talk about 2, 3, 5, or even 10 different ways to put ribbon on a Christmas tree. While it's true there are many approaches, focusing on a few core techniques will give you fantastic results without overwhelming you. Here, we'll explore three highly effective methods for how to put ribbon on a Christmas tree, ensuring a stunning display.The Cascading/Vertical Method
This method creates a dramatic, flowing look, with ribbon appearing to "cascade" down the tree. It’s particularly effective for adding height and elegance. **Steps:** 1. **Start at the Top:** Take the end of your wired ribbon and secure it near the top of your tree, either by tucking it deep into the branches or using a piece of floral wire to attach it to the center pole. 2. **Create Vertical Strips:** Let the ribbon fall naturally down the tree. As you move down, gently tuck the ribbon into the branches at various points, allowing it to billow out slightly between tucks. Think of it as creating soft, vertical waves. 3. **Vary the Width:** Don't just run the ribbon in straight lines. Angle it slightly from left to right as you descend, creating a more organic, natural flow. 4. **Repeat Around the Tree:** Continue this process, creating several vertical strips of ribbon around the tree. The number of strips will depend on the size of your tree and the width of your ribbon. Aim for even spacing, but remember that perfection isn't the goal – natural flow is. 5. **Cut and Tuck:** Once you reach the bottom of the tree, cut the ribbon and tuck the end securely into the branches. This method is fantastic for drawing the eye upwards and downwards, emphasizing the height of your tree. It works beautifully with wider ribbons that can create significant impact with their drapes.The Random Tuck Method
This technique offers a more organic, whimsical, and less structured look. It’s perfect for those who want their ribbon to appear as if it’s naturally woven into the tree. **Steps:** 1. **Place the Start:** For you to add ribbon to your tree with the random method, place the end of your ribbon at the topmost part of the tree and tuck in a section at a random area on the Christmas tree. Secure it firmly. 2. **Weave and Tuck:** Instead of continuous vertical lines, you'll be creating shorter segments. Pull out a length of ribbon (anywhere from 12 inches to a few feet, depending on your desired look) and then tuck it into another random spot on the tree. 3. **Vary Direction:** Just continue tucking right, up, left, down, and diagonally on the tree in the same parts. The key is to avoid any discernible pattern. Let the ribbon flow where it feels natural. 4. **Create Puffs and Drapes:** Between tucks, allow the wired ribbon to puff out or drape softly. You can gently shape these sections with your hands. Remember, it’s simple to adjust wired ribbon for the right look, and it’ll stay in the shape you want. 5. **Cut as Needed:** You can either use very long lengths of ribbon and continue weaving, or cut shorter segments (e.g., 3-5 feet) and tuck both ends into the tree, creating individual "bursts" of ribbon. This latter approach is often easier for beginners. The random tuck method is excellent for creating depth and making the tree look full and lush. It allows the ribbon to become an integrated part of the tree's texture rather than just an overlay.The Looping/Pouf Method
This method focuses on creating distinct loops or "poufs" of ribbon that sit on the branches, adding volume and a playful texture. It’s also easier to create bold loops and billows with wired ribbon using this technique. **Steps:** 1. **Create a Starting Loop:** Take your ribbon and create a small loop, securing the end deep into a branch. 2. **Form a Pouf:** Pull out a section of ribbon (e.g., 6-12 inches) and gently push it back into the tree, tucking it into another branch a short distance away. Allow the ribbon between these two tucks to form a soft "pouf" or "bubble." 3. **Repeat and Vary:** Continue this process, creating more poufs. You can make them uniform in size or vary them for a more dynamic look. You can place them horizontally along branches, or cluster them. 4. **Secure as You Go:** For larger poufs or more dramatic loops, you might want to use floral wire or pipe cleaners to secure the ribbon to the branch, ensuring it holds its shape. 5. **Layer for Fullness:** This method works wonderfully when layered with other ribbon techniques or used to fill specific gaps. You can also combine different widths of ribbon for more visual interest. This method is particularly effective for filling in sparse areas of the tree and adding a luxurious, dimensional quality. It's also great for highlighting specific sections or creating focal points within your tree design.Achieving a Cohesive Look: Tips from the Experts
Beyond the specific techniques, several overarching principles can help you achieve a professional and cohesive look when you put ribbon on a Christmas tree. As we learned, starting with the ribbon is key. The designer’s insight that "the placement of the ribbon begins to create the movement of the overall design and allows the remaining decor to fall into place within the open spaces of the branches" is invaluable. This means your ribbon isn't just an add-on; it's the architectural framework for your entire tree. Here are some additional expert tips: * **Step Back Frequently:** It's easy to get lost in the details when you're up close to the tree. Periodically step back several feet to assess your progress. This allows you to see the overall balance, identify any uneven spots, and adjust the ribbon's flow. What looks good up close might look lopsided from a distance. * **Utilize Wired Ribbon's Flexibility:** Remember, it’s simple to adjust wired ribbon for the right look, and it’ll stay in the shape you want. Don't be afraid to manipulate it. Pinch, twist, curl, and bend the ribbon to create volume, loops, and movement. This is where wired ribbon truly shines, allowing you to sculpt the ribbon into dynamic forms. It’s also easier to create bold loops and billows with wired ribbon, so embrace its malleable nature. * **Consider Tree Size and Shape:** A larger, wider tree can handle more ribbon and bolder drapes. A narrower or smaller tree might benefit from more delicate ribbons or fewer, more strategic placements. Adapt your technique to the specific dimensions of your tree. * **Layer Ribbons:** Don't be afraid to use multiple types or widths of ribbon. A wide solid ribbon as a base, with a narrower, perhaps patterned or glittered ribbon layered on top, can add incredible depth and visual interest. * **Less Can Be More:** While ribbon is fantastic, avoid overdoing it. The goal is to enhance, not overwhelm, your tree. Sometimes, a few well-placed, impactful sections of ribbon are more effective than trying to cover every branch. * **Secure Properly:** Ensure all ribbon ends and tucked sections are securely fastened. You don't want your beautiful work unraveling mid-season. Use floral wire or twist ties that match your tree's branches for invisible support. By following these principles, you'll not only learn how to put ribbon on a Christmas tree effectively but also develop an eye for creating a truly harmonious and stunning holiday display.Troubleshooting Common Ribbon Challenges
Even with the best intentions and the right tools, you might encounter a few hiccups when putting ribbon on your Christmas tree. Don't get discouraged – these are common challenges, and they're easily overcome with a bit of patience and know-how. * **Ribbon Falling Flat or Losing Shape:** This is the most frequent issue, and it almost always points back to the type of ribbon used. If your ribbon isn't wired, it simply won't hold its form. **Solution:** Invest in high-quality wired ribbon. If you're stuck with unwired ribbon, you can try using floral wire to create internal supports, or opt for a simple wrap-around technique where the ribbon is tightly wound around branches rather than draped. * **Not Enough Ribbon:** You start strong, but then halfway through, you realize you're running out. **Solution:** Plan ahead! Measure your tree's height and circumference. As a rough guide, a 7-foot tree might need anywhere from 50 to 100 feet of ribbon, depending on the technique and desired fullness. It's always better to have too much than too little. Buy an extra roll if you're unsure. * **Uneven Distribution or Lopsided Look:** You step back, and one side looks fantastic, while the other seems sparse or cluttered. **Solution:** This is where patience and stepping back frequently become crucial. As you work, regularly move away from the tree to get a full perspective. Adjust sections as needed. Remember, it's a creative process, not a race. Don't be afraid to undo and re-do sections until they look right. * **Ribbon Getting Tangled or Twisted:** Especially with long lengths, ribbon can become a tangled mess. **Solution:** Unroll only as much ribbon as you need for a section. Keep the rest of the roll neat. If you're working with very long pieces, have someone help you manage the excess, or carefully unspool it on the floor as you work your way around the tree. * **Difficulty Securing Ends:** Ribbon ends poking out or falling loose can detract from the overall look. **Solution:** Tuck ends deeply into the tree's interior branches. For extra security, use small pieces of floral wire that match the branch color, or even green pipe cleaners, to twist around the ribbon and a sturdy branch. This creates an invisible anchor. By anticipating these common issues and knowing how to address them, you can ensure a smoother and more enjoyable ribbon-decorating experience, leading to a truly stunning Christmas tree.Elevate Your Holiday Decor with Ribbon
Learning how to put ribbon on a Christmas tree is more than just a decorating task; it's an opportunity to infuse your holiday decor with personal style and elegance. As we've explored, ribbon is incredibly versatile, capable of transforming a simple tree into a focal point of festive beauty. It adds depth, texture, and a cohesive design element that lights and ornaments alone can't quite achieve. Whether you're aiming for a grand, cascading display or a subtle, organic weave, the right ribbon and technique can elevate your tree from ordinary to extraordinary. Remember the key takeaways: prioritize wired ribbon for its malleability and shape-holding capabilities, start with your ribbon before other decorations to establish flow, and embrace patience as your most valuable tool. The struggle of finding the perfect ribbon or getting it "just right" is real, but with the tips and techniques outlined here, you're well-equipped to overcome any challenges. Ultimately, decorating your Christmas tree should be a joyful experience. So, put on some holiday music, gather your beautiful ribbons, and let your creativity flow. The result will be a tree that not only looks stunning but also reflects the warmth and magic of the season, becoming a cherished centerpiece for your holiday celebrations.Conclusion
You now possess the knowledge and techniques on how to put ribbon on a Christmas tree like a seasoned decorator. We've covered everything from selecting the best wired ribbon and understanding its benefits, to exploring popular methods like the cascading and random tuck techniques, and even troubleshooting common challenges. By following these step-by-step instructions and expert tips, you can transform your Christmas tree into a breathtaking display that truly stands out. Don't let the idea of "hard work" deter you. With a little patience and the right approach, putting ribbon on your Christmas tree can be one of the most rewarding parts of your holiday decorating. Now it's your turn to welcome the holidays with beautiful Christmas tree ribbon decorations! We'd love to see your festive creations! Share your ribbon-decorated Christmas tree photos in the comments below, or tell us which technique you found most effective. For more holiday decorating inspiration and tips, be sure to explore our other guides on [Link to another relevant article, e.g., "Choosing the Perfect Christmas Tree Lights"] and [Link to another relevant article, e.g., "Creative Christmas Ornament Display Ideas"]. Happy decorating!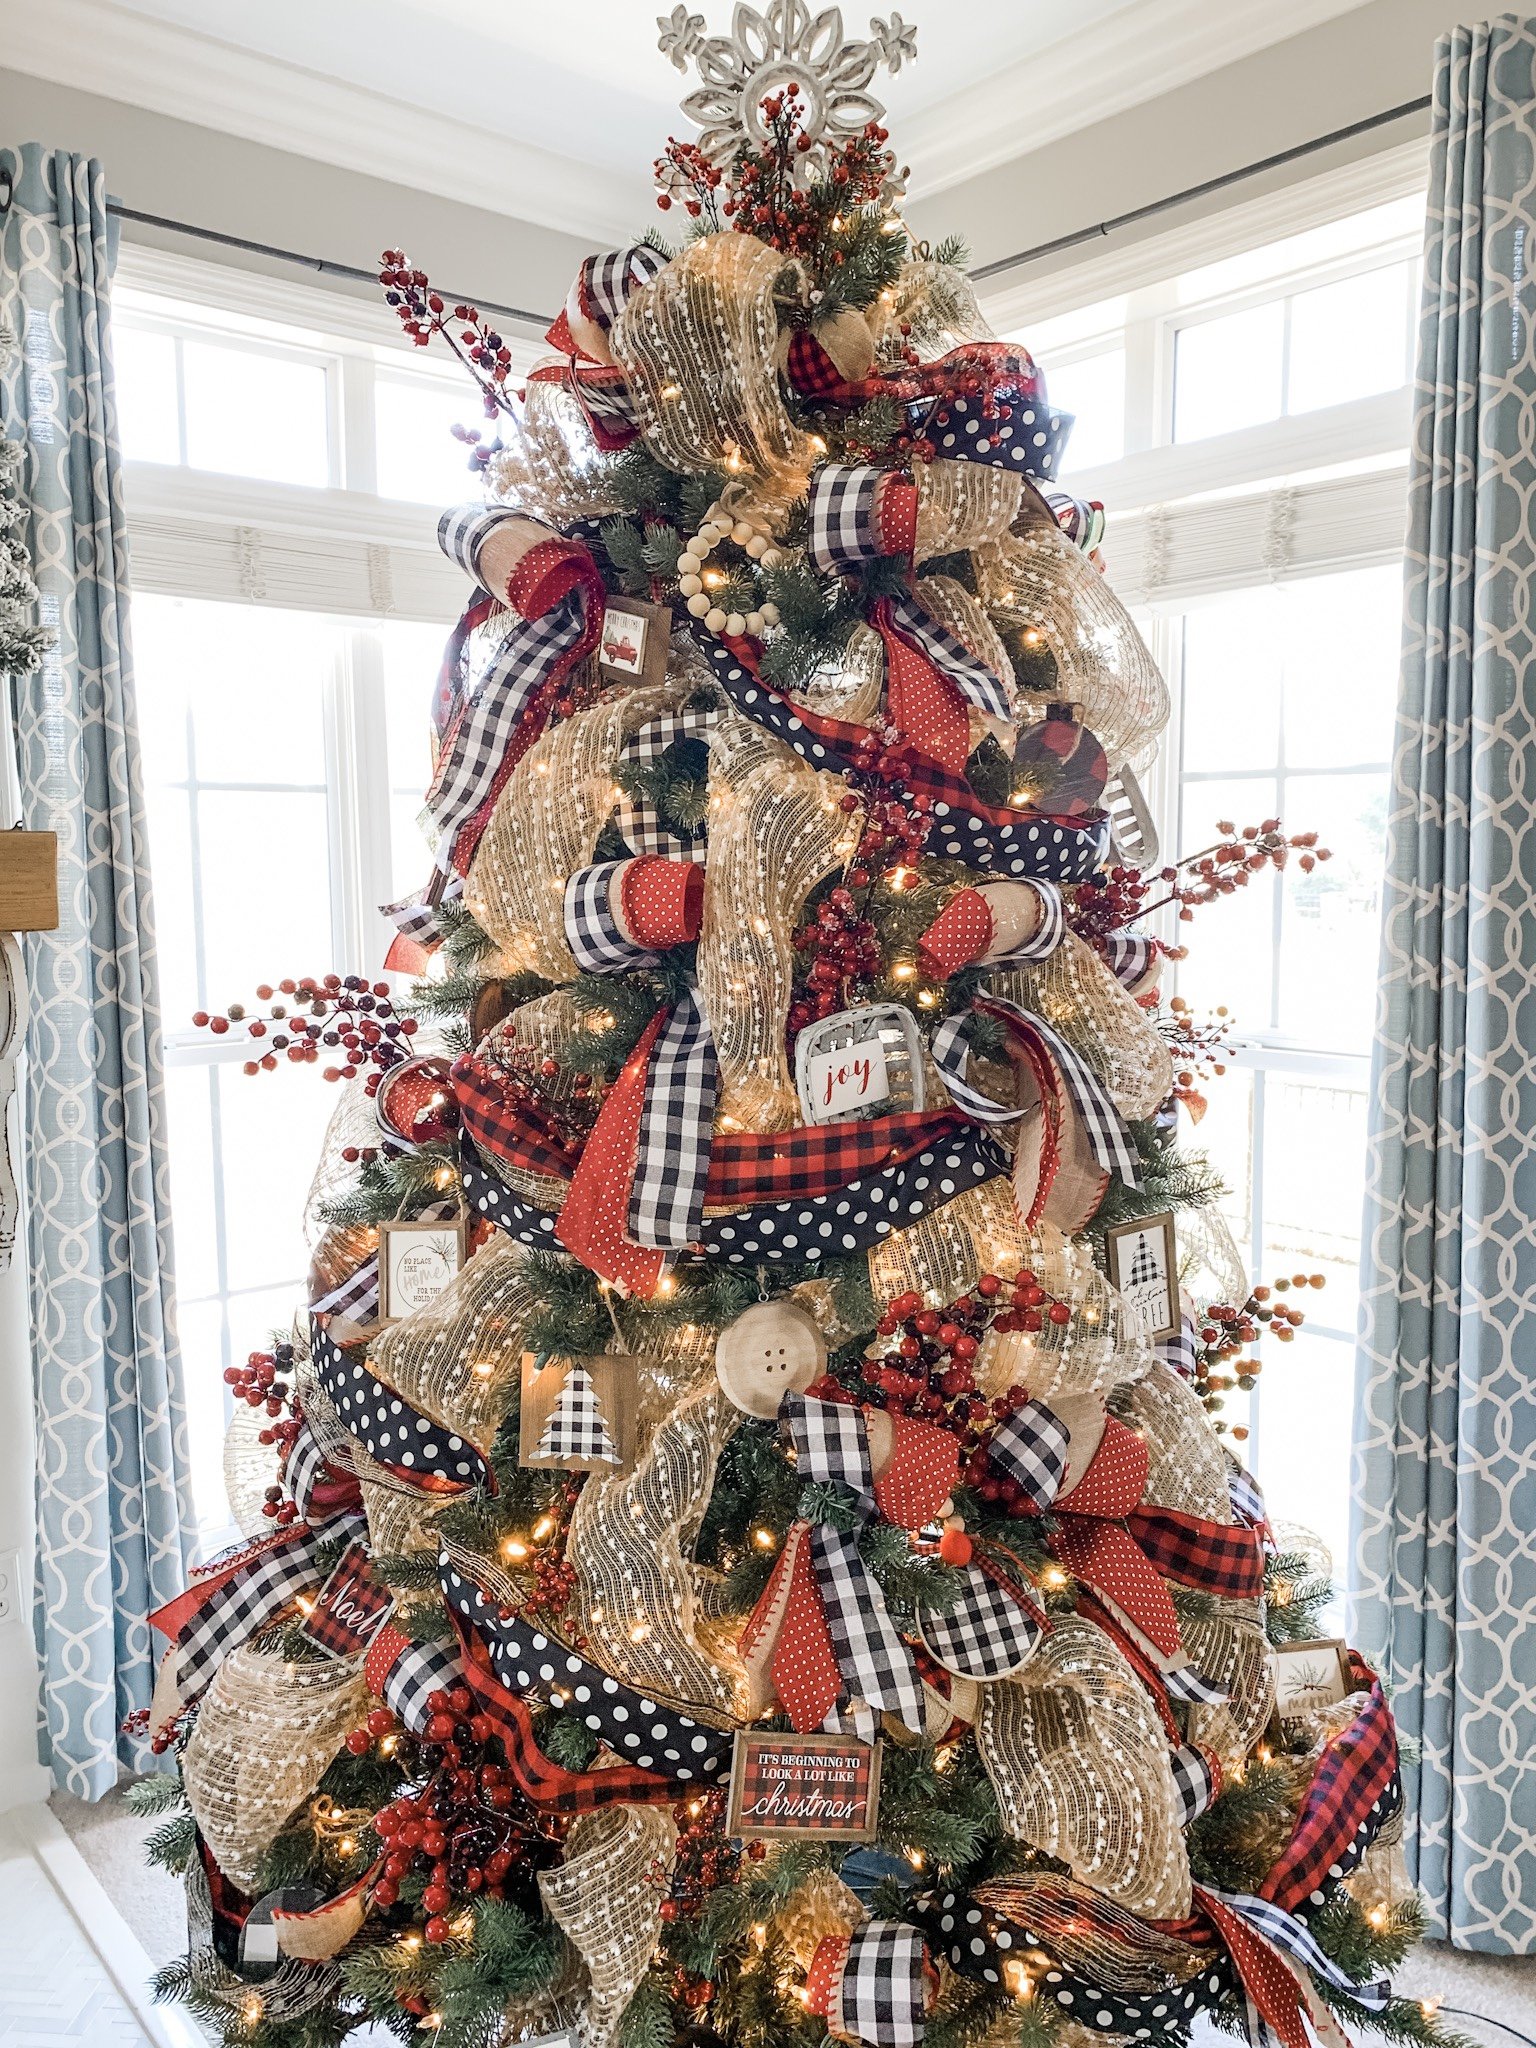
Christmas tree ideas using ribbon, buffalo check and polka dot
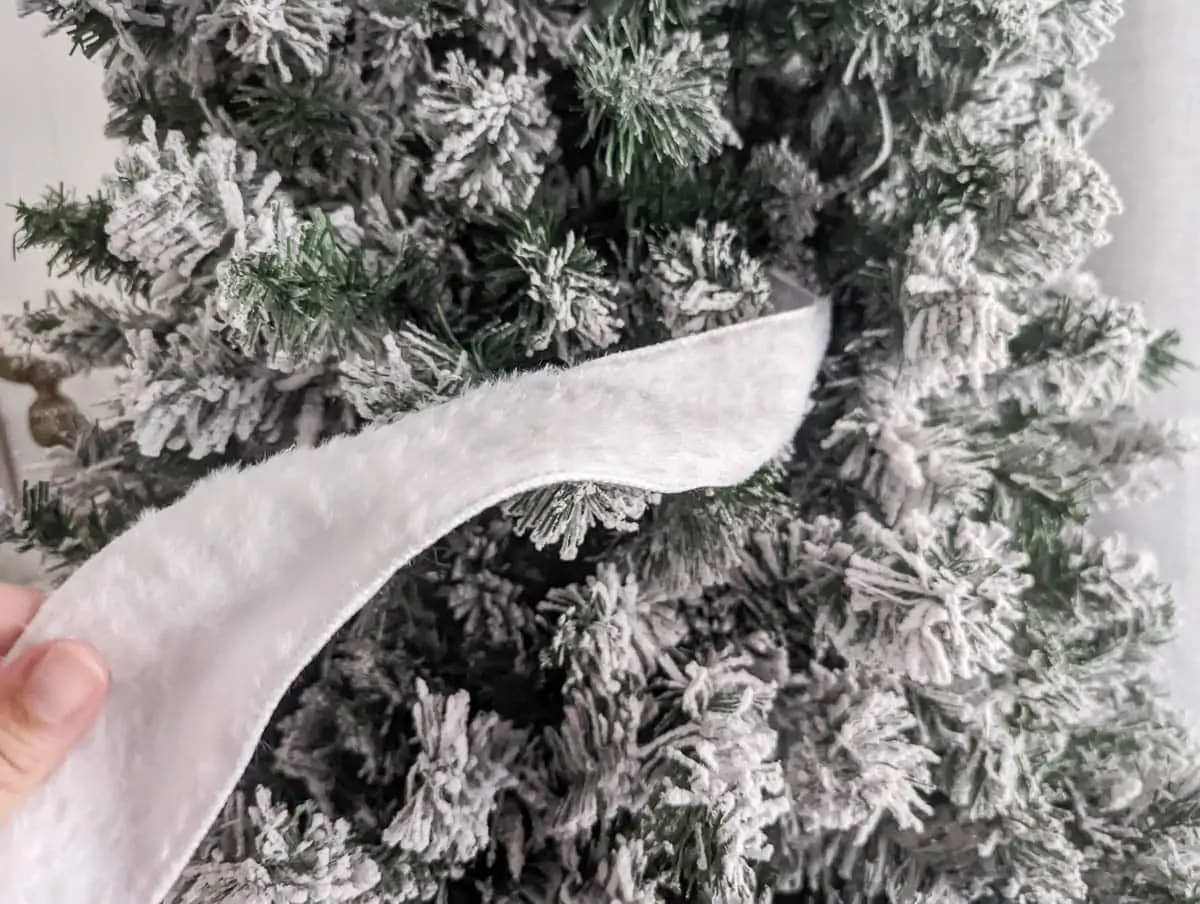
How to Put Ribbon on a Christmas Tree: The Best and Easiest Method

How to Decorate a Christmas Tree with Ribbon - Kippi at Home
